We can all agree that there are not many limits on what you might consider suitable to dip in chocolate. This Valentine’s Day, create your own fun and romantic dessert of sinful indulgence. Strawberries, dried fruit, and pretzels are traditionally dipped in chocolate, but tradition is made to be broken. Put together your own vision of luscious, chocolate-dipped bits and pieces. Pears are superb dipped in dark or milk chocolate, and pineapple mixes well with milk chocolate. With one taste of the decadent morsels you prepare, your sweetheart is guaranteed to melt.
“Tempered chocolate is the preferred ingredient for dipping,” says The Culinary Institute of America Chef Peter Greweling. “Many home candy makers are intimidated by the thought of tempering chocolate. In truth, the process is much simpler than getting behind the wheel to drive. With just a little practice and patience, you can use the seeding method below to properly temper chocolate every time.”
Tempering Chocolate
- Weigh or measure chocolate you will be tempering. As always, weight is the preferred method for measuring any ingredients; otherwise, use the following chocolate conversion table:
- 6 ounces = 1 cup pistoles* or chopped chocolate, ½-inch pieces
- 8 ounces = 1 ⅓ cups pistoles or chopped chocolate, ½-inch pieces
- 10 ounces = 1 cup melted chocolate
- 8 ounces = ¾ cup melted chocolate
- Weigh or measure second amount of chocolate equal to 25 percent of original amount.
- Fully melt larger amount of chocolate using microwave or water bath. Remove bowl of melted chocolate from heat. Chocolate should be 120°F for dark chocolate or 110°F for milk or white chocolate.
- Add smaller amount of unmelted chocolate to melted chocolate. This is called the seed; it will cool the melted chocolate and cause it to set the way you want. You can use either pistoles or a single block as the seed; a single block has the advantage of easy removal once the chocolate is tempered.
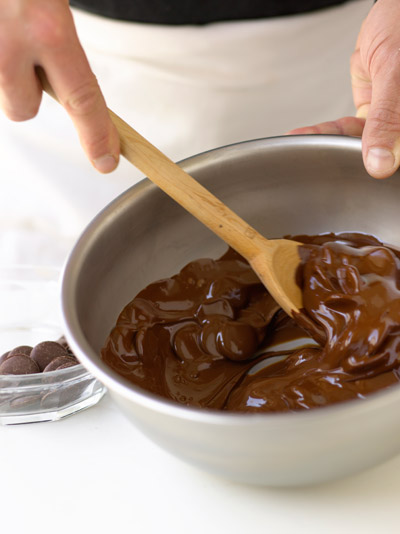
- Stir melted chocolate gently and constantly until temperature falls to 85°F for dark chocolate or 83°F for milk or white chocolate. This will take 15 to 20 minutes, and most or all of the seed should have melted by the end of this time.
- Testing chocolate for temper is the only way to know for sure that chocolate is actually tempered. The following temperatures give good guidelines, but even with strict adherence to technique, no one can tell for sure whether chocolate is tempered without performing a test to see how it sets.
- Make sure chocolate is below 90°F for dark or 87°F for milk or white chocolate.
- Dip spoon in chocolate, place spoon on work surface, and leave it undisturbed for 7 to 8 minutes at working room temperature, 68°F. Do not yield to the temptation to refrigerate the spoon! This will only give inaccurate results.
- After 8 minutes have passed, look closely at the chocolate on the spoon. If chocolate has set so that it no longer looks wet, and surface is uniform and without streaks, chocolate is tempered.
- If chocolate has not set or has set with a streaky appearance, chocolate requires further seeding (see step 8).
- If chocolate sets properly, gently warm it over water bath not exceeding 89°F for dark chocolate or 86°F for milk or white chocolate.
- If seed has melted but chocolate is not setting quickly without streaks or spots, it must be seeded more. Add a few more pistoles or another small block to bowl, and stir for another 3 to 4 minutes. After this time, test again (step 6), and proceed from there.
- Remove any unmelted seeds from melted chocolate.
- Use chocolate as desired while maintaining the proper working temperature.
How To Dip
- Prepare the centers. The centers to be dipped should be dry and at a cool room temperature. When dipping fruit in chocolate, allow it to warm to room temperature rather than dipping it while it is ice-cold from the refrigerator. If cutting fruit for dipping, dry the cut pieces with a paper towel to remove excess moisture from the surface of the fruit.
- Temper the chocolate or melt the coating. Dipping centers in untempered chocolate will result in bloom and chocolate that is not sufficiently crisp. If using a compound coating, follow the manufacturer’s guidelines for temperature.
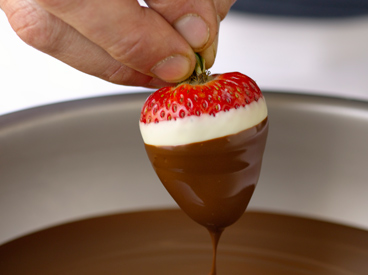
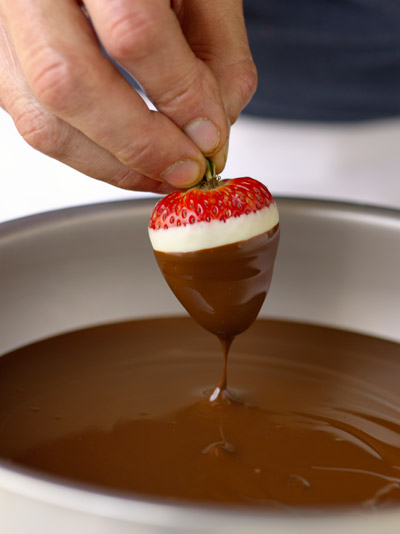
- Dip the centers. The centers may be entirely enrobed in the chocolate by dipping with a fork, or partially coated by holding one end of the center and dipping up to the desired level in the chocolate.
- Allow the chocolate to set. Placing the dipped centers on parchment paper to set keeps them clean and ensures that they will not stick to the surface. This step should always be performed at room temperature to obtain the best shine and snap from the chocolate.
*Pistoles
Discs of couverture, which is chocolate made from cacao beans that have been fermented and dried properly then roasted, refined, and conched to improve flavor and texture.
Recipe, photos, and video courtesy The Culinary Institute of America. All rights reserved. You can find this recipe and more in The Culinary Institute of America’s Chocolates and Confections at Home (2010, John Wiley & Sons Inc.).
Become a Saturday Evening Post member and enjoy unlimited access. Subscribe now
